March 30, 2012

March Printable: Happy Easter Banner


Yesterday our talented and longtime contributor Kerry of KBatty Designs shared her fun Easter card tutorial with you. Today her Easter banner will kick off our new series of printable downloads created by our Etsy Street Team for you. Use the banner to decorate your home, or to lend some spirit to you Easter brunch festivities.

You can download the complete banner here:


To assemble it follow these instructions:

  1. Print each page on card stock
  2. Trim out each 4 x 4inch square on the gray lines - use scissors, x-acto knife & ruler or paper cutter...whatever you prefer
  3. Use twill tape, ribbon, or twine to hang the banner. You can either tape twine to the back of each square, or more elegantly, punch a hole into each corner of the panels and thread twine or ribbon through each square. Use your imagination!
Quick Tip: Small removable hooks like these work really well for hanging your banner.


A big thank you to Kerry for sharing this with us and have fun with your banner!


Simone
groundsel.etsy.com


March 29, 2012

A Potato Stamp Tutorial :: Easter Cards


Easter is almost here! Do you celebrate? Want an easy craft to make part of the fun? When you get tired of dying all those eggs (did you see this post last week? Amazing!) pull out your spuds & have some fun with potato stamping. This is so easy it's criminal.

March 28, 2012

Spring 2012 Fashion Trends on Etsy!

Since Spring has officially sprung here in NYC, I thought it would be fun to feature some of spring's hottest fashion trends.  Check it out below to see how you can snag these trends on Etsy!


Mint is everywhere right now and this color just screams "Spring!" to me!  Adding mint-colored bobby pins would be a nice way to jazz up a hairdo or you can accessorize with mint earrings or a mint necklace.  You can also knock out two trends in one with this lovely green colorblocked clutch- so fun!


Brighten up your cubicle or office space with this amazing woven journal- no more boring office supplies!  You can also add a little bit of bright colors/neons to your life with any one of these pretty jewels.  Trust me, people will definitely notice that bit of color- in good way! :)


Florals is one of those spring trends that reappears year after year, but what is more springy than flowers in bloom? :)  You can carry your business cards in this pretty floral card holder or add a bit of floral decor to your home with this beautiful photograph.  Also, you can use this floral ribbon or these crochet flowers as hair accessories or even to finish off a package prettily!

Tell me: Which of these Spring trends is your favorite?

 
By Nnenna of star-crossed smile


March 27, 2012

Fancy Pants


I love fun underwear. All my favorite panties are in colorful prints. Alas, fun prints aren't always easy to come by (or so my mother, who gives me underwear every year for Christmas, claims). The solution? Print your own!

Need more time for taxes? File a tax extension!

Oh no! Taxes are due and there’s no time to complete them! My deductions aren’t ready and I don’t even all the receipts I need in anything resembling an order! What am I supposed to do?

If you found yourself saying these very things with the tax deadline approaching, it may be time to file for a tax extension. Yes, they exist, and work surprisingly well. All you have to do is file one simple form and voila, you have a lot of extra time to get everything ready!

But is it really that easy? Does filing a tax extension come with unforeseen consequences? Let’s take a look.

Filing

Presumably after reading the opening you probably just want to know how to file for an extension, so we’ll cut to the chase. The form you want is Form 4868. It’s an astonishingly simple form for one with such power, and only takes a few minutes to fill out. You can also file your tax extensions using online services like Turbotax Easy Extension. Though those services do charge you a small fee, they can save you the effort of finding and mailing the 4868 form. No matter how you file, you can buy yourself a six-month extension on the time you need to pay your taxes.

But there’s one major caveat you must remember when filing a tax extension. As you fill the form out, you’ll notice the information you provide is pretty basic: name, address, etc. However, the second part of the form asks you how much you owe.

Wait, what? How are you supposed to know how much you owe if you haven’t filled out your forms yet? The whole point of this was that I didn’t have time to file!

The problem is the tax extension covers your actual tax filing and nothing else. So when you send Form 4868 into the IRS, you must also submit a payment toward it by the tax deadline – this year that’s April 17th. However, you don’t have to have an exact amount. You just have to figure out how much you estimate you owe. (Outright.com can help… sign up for a free account and estimate how much you owe in taxes today!) When you do file, you will either pay the remainder of the amount you owe or receive a refund.

What To Do After

Now that you’ve sent in the paperwork to push back your due date (and a check how much money you owe, right?), what do you do now?

You’ve been granted a six month pass on your taxes, so use it wisely. Get as organized as humanly possible. Find all those missing receipts and count up every last penny you think you can deduct on your taxes.

Don’t waste this time as it’ll be over before you know it. You want that estimated payment to be either on the money or too much so you get some in return and avoid penalties. Plus, the IRS doesn’t exactly hand out free passes all the time, so when they throw you a bone, milk it for all its worth!

Getting organized during this time can also help you in the long run. After all, you’ve probably always wanted to get your business into tip-top shape, so now’s the opportunity! Get all that paperwork into order and keep it there. Then come next year there won’t be a need to file for an extension.

This post is brought to you by Outright.com, the easiest way to manage your business finances online. Sign up today for a free Outright account!

March 23, 2012

Get Out There: Virginia Kraljevic and the Etsy Success Symposium

Print by Virginia Kraljevic

Etsy's Success Symposium will return on March 30th. This year, the all-day event will focus on how to get found now that you've set up your online presence with your Etsy shop. One of the six workshops of the day will feature our very own Virginia Kraljevic. A member of last year's leadership team of The {NewNew} and a frequent contributor to this blog, Virginia is an American artist and illustrator based in New York City. Her whimsical pen and ink drawings have been commissioned by companies such as Lacoste, Vans, and Etsy. Virginia’s artwork has been showcased in galleries, shops, and craft shows in the United States and Europe. In addition, she has a background in visual display working for Anthropologie and has assisted with prop styling and art direction on photo shoots for Vogue Hommes International and Chanel. If you attended our past Cavalcades, you will be familiar with her distinctive decorative style.
At Renegade Brooklyn

Virginia has participated in shows and markets along the Northeast Coast such as the Renegade Craft Fair, The Union Square Holiday Market, The Handmade Cavalcade, Maker Faire New York, SoWa Open Market, Crafts in Chelsea, and the Brooklyn Lyceum Markets. With this rich background it is no wonder that she was asked to participate in the Get Out There: Using Craft and Wholesale Shows to Support Your Small Business panel of the symposium.

Zoom

In catching up with her before the symposium, I asked Virginia if she had attended last year's event:

"Yes, I was there last year and got to spend the day with fellow {NewNew} Etsy Team members, some interesting guest speakers, and the people who make Etsy what it is.  It was a day of exchanging ideas, stories, and it offered some advice targeted for the Etsy shop newbie.  This year is geared more for the experienced Etsy seller who is ready to make more a statement in all that they do -- whether it's an email, a tweet, or in-person at shows."

As a bit of a preview of the Get Out There panel, I wondered if she could share some advice for us sellers:

"In keeping with this year's theme of getting noticed, the best advice I can offer is to simply get out there.  No one will know just how wonderful you or your work is unless you are willing to share a little bit of yourself and your work with the world.  If creating and running your own business is what your heart is urging you to do, then it is your responsibility to follow your heart wherever it may lead you.  You will surprise yourself just how far you can go with enough persistence, confidence, and by wearing a smile."

And before I forget, Virginia reminded me to look out for the accompanying Etsy Symposium workbook the day of the event -- it's free and will be available online.  She's contributed a few pages filled with craft show tips that she herself wishes she had known when she began doing shows.


The Etsy Success Symposium includes the following workshops and will stream live from the Etsy Online Labs:
  • Get Featured: Learn How to Grab the Eye of a Curator with Mary Andrews and Emily Bidwell
  • Get Noticed: How to Romance Blog and Magazine Editors
  • Get Storied: Behind Every Product is a Story with Michael Margolis
  • Get Pinned: Build your Community and Brand with Pinterest with Christine Martinez
  • Get Out There: Using Craft and Wholesale Shows to Support Your Small Business
  • Get Found: Conquering Searches on Etsy and the Web with Danielle Maveal and Michelle Spaulding
Simone
groundsel.etsy.com


March 22, 2012

Spring Color in NYC

Spring has arrived in NYC (yay!), and with it comes a lush bounty of colors popping up all over the city. As no other time of the year is quite so magical (both weather and color-wise), I couldn't resist taking a stroll with my camera the other day to capture the blooming foliage that seems to get brighter and more beautiful with each passing day.

And I'm sure it's no coincidence that many NewNew team members are taking a cue from the colors of the season with their latest offerings. So with that, I'd love to share some of my favorite items that pick up the colors I captured with my camera on that lovely neighborhood stroll. Enjoy!

Pretty Pinks - (from top): Fernando Jewelry; Knitting Guru; Woolly Boo.

Luscious Lavenders - (from top): Edward Owl; PriaVanda; Brooklyn Owl.

Ravishing Reds - (from top): Webbedware; Tider Design; Suede Soul.

Glorious Greens - (left): Roots in Rust. (Right, from top:) Pretty Stationery Shop; KnitKnit; Jess Switaj.


Lauren // Lolafalk

March 21, 2012

Getting the Creative Engine Humming Again

We’ve all had them…those days when our creativity eludes us. And it can show up in a variety of ways. We may feel like working and just not have any new ideas. Or we may have the ideas, but lack the motivation to get to work. What’s an Etsy seller to do? 

Well, how about turning to other Etsy sellers for some advice?  The NewNew Blog asked some of our very own members for tips on how to get the creative engine going again when it begins to sputter. Here’s what they had to say. 

When I get stuck creatively, I will build up my stock of made-to-order pieces that are my best sellers. Inevitably, while working on an old standard, new ideas will pop into my head. Another favorite thing to do is go for a long run. The endorphin rush always seems to help get those creative ideas flowing!

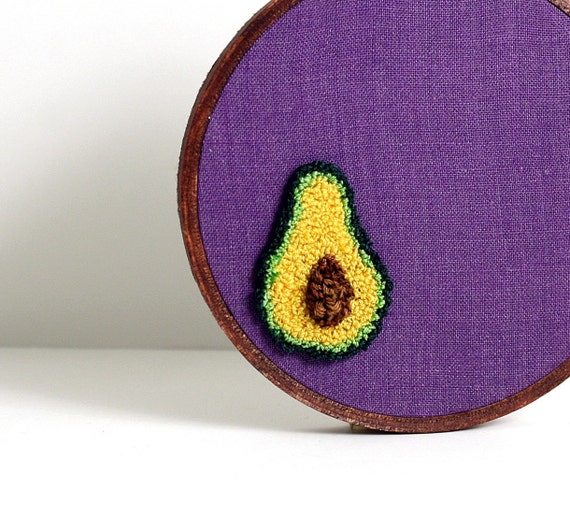
Avocado Embroidery Hoop

From Aneta Hayne of Stitchinnetka
None of us likes to get stuck creatively. The moment you feel that void and lack of creative power, it seems like everything slows down and loses its meaning. I think the best thing to do is to consciously recognize this state of emptiness and acknowledge it. Everything happens for a reason, and sometimes it simply means that it's time to take a break, meet up with your friends, go jogging, take a good yoga workshop, or cook or bake something. That usually works for me; just turning my attention to something completely different does wonders.

I know that it might be frustrating if you have a certain deadline for your project, but a lot of times you can create amazing things within minutes. It all comes down to having an open mind. And sometimes our mind just has to be submerged into nothingness. After that phase, there is always some sort of inspiration that will roll into your lap. Sometimes it's a new custom order; other times it’s somebody’s birthday when you can make a special little gift. After that, new ideas can bloom.

Just remember to always start small and let yourself spread your wings again. Even doodling or making silly crafts with kids does wonders. Just be patient and kind to yourself.

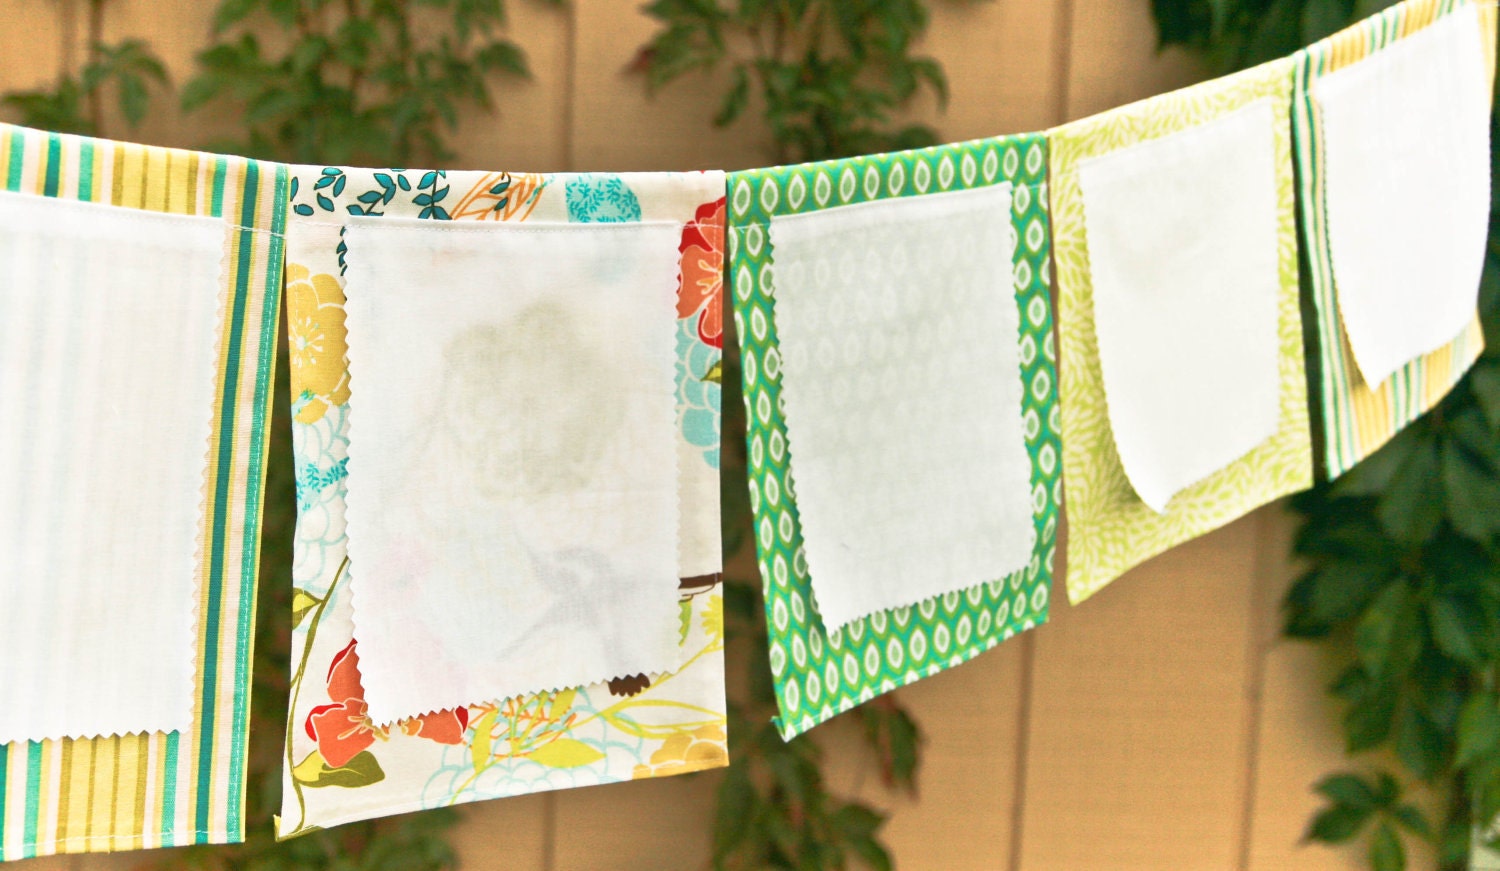
Prayer Flags Party Decoration

From Paulette Brooks of Paulette Brooks All Access Art
Creativity isn't just something one can summon up. You're born with it, and it manifests itself at any time it cares to ...especially at unconventional times, like when you see some debris on the sidewalk, and it inspires you to turn that debris into a gorgeous necklace. Creative people can't help themselves...creativity will always rear its head and show its fancy face. Unfortunately, nowadays, that face gets smothered under endless distractions and duties...emails, jobs, texts, bills, and so on.

My biggest problem is not in how to summon up the creativity but how to summon the time to allow for its expression. I can't seem to stop the flow of “creativity,” it's there in abundance...it's finding more time in my life to allow for it that I'm tackling.


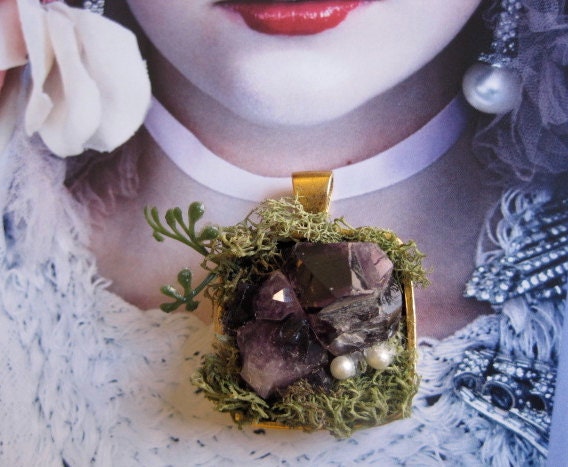
Amethyst Garden Magical Pendant

How about you, dear readers? Do you have any advice for the creatively stumped? What's your secret to unlocking all that gorgeous creativity inside? Let us know in the comments!


By Mary Ann (maryannfarley)

March 20, 2012

The Art of Pysanky


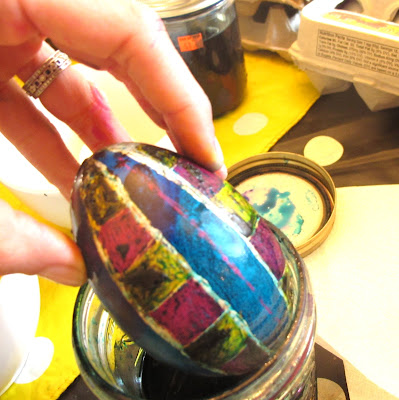
Every year, my friend Catalina Bertani posts photos on her Facebook page of the beautiful pysanky she makes in the weeks leading up to Easter. (One such example shown above.) Even if you’ve never heard of pysanky, chances are you’ve seen one of these glorious eggs at some point. Pysanka (pysanky is the plural form), refers to the traditional Ukrainian designed easter egg, which is achieved through a wax resist and dye method. Although Catalina grew up in Iowa and is originally from Columbia, making pysanky has become a tradition in her own Brooklyn family. This year she invited her friends to come over and learn the basics of this ancient (yes, ancient; the tradition dates back to pre-Christianity) art form. Catalina’s table was all set up for decorating when my eight-year old son Jake and I arrived. Tables were covered, dye baths were ready, and all the tools we needed were available. In addition to regular white chicken eggs, she also gave us each a much larger goose egg, which you can order online. She also had a few ostrich eggs to show us, but as first timers, we weren’t ready for those!


Here are the basic steps we took to create our very first works of pysanky art: First the eggs need to be washed with mild soap and water, and rinsed in a bath of vinegar. This is to remove any traces of resist that might be on the egg and ensure that both the wax and dyes take nicely to the egg’s surface. Next, the eggs must be relieved of their yolks, and though I’ve blown yolks from eggs with my mouth before, here we used a hand pumped egg blower, which also doubled as an awl to punch the holes in each end of the egg prior to pumping out the yolk.


Above, Jake squeezing out the yolk. Much more pleasant that blowing by hand (or, by mouth, actually). Then the holes needed to be sealed with wax, to prevent the egg from filling up with liquid while in the dye baths. We used a tool called a kistka for this, which is the “drawing” tool used for making designs on pysanky eggs. A kistka (shown below) has a tiny pot at the end of a rod that holds a small chunk of beeswax. The pot is then held above a flame until it’s melted, then comes out of a tip below the pot when applied onto the egg (sort of like a fountain pen).


Next we drew a design onto the egg in wax using the kistka; wherever there was wax the egg would remain white. The egg then went into its first dye bath. The rule for pysanky (and any multiple step dye process) is to begin with lighter colors then do darker ones. I started with yellow.


Next I added further designs in wax. Wherever I drew now is where the egg would remain yellow after the next dye. I put the egg in a bright fuchsia for the second color, and a third round of wax drawing preserved that dye.


Finally I put the egg into a lovely blue bath. Traditional pysanky eggs use five or fewer colors. I stopped after three mainly because the process thus far had taken me well over an hour! Below is my egg coming out of its blue dye bath. Though I thought I could tell what it was going to look like, the proper “reveal” didn’t occur until the final step, in which the egg goes into a toaster oven (or any oven) on a heat setting only high enough to melt the wax off of the egg.


And, ta da! I was so happy with the results of this project. My son was too-he intuitively knew to keep his design scheme simple, and wound up with a very dramatic egg using only red and black dyes, with his name marked in white.


Jake's egg looked amazing too!


Here is the egg Catalina spent the afternoon working on. She is clearly a seasoned hand. For the record, none of the eggs we made here can technically be called pysanky, since the term refers to the design motifs rather than the wax resist method of applying the design. But many of the traditional motifs are very simple geometric designs, and can be replicated fairly easily.


There are loads of online resources for supplies and information on how to make pysanky. And right now, through May 27th, the Ukrainian Museum on the lower east side (222 E. 6th Street between 2nd and 3rd Avenues in Manhattan) has nearly 300 pysanky eggs on display, boasting an incredible range of color, design and craftsmanship. They’ll also be offering workshops on how to make pysanky. (Call 212-228-0220 for information.) Be sure to check it out, and tell them that the {NewNew} sent you!

 Posted by Leslie Astor
 astorknot.etsy.com
 ispybabybunting.etsy.com

March 16, 2012

Recycling Ideas On Pinterest

Readers, are you all clued in to the wonderful world of Pinterest? If you aren't, I highly recommend that you get an invitation and join. As with every online site, you should review the guidelines carefully and make sure you want to be part of the site. If you do, you'll see how it is a great tool for inspiration, marketing, business development, and creativity.

But I've digressed, of course! The reason I'm talking about Pinterest today is because I found an entire world of recycling ideas and crafts and it makes me so happy and I think it will for you, too!

March 13, 2012

How to Make a Checker Set


I've been wanting to make a checkerboard for some time. My older daughter just turned four and is starting to learn how to play games, although we can only do it when my younger daughter (2) is asleep because she likes to collect all the pieces we are playing with and hoard them in her lap. Take a look at the tutorial below, and afterward enjoy the game! (*Note: This tutorial originally posted here.)

How to Make a Checker Set
1. First, make handmade clay by combining 2 cups of flour, 1/2 cup of salt, and 3/4 cup of water in a medium mixing bowl. Stir until combined, then knead for 10-15 minutes.

2. Roll the dough out to about 1/4 inches thick.

3. Using a cookie cutter, cut out 26 pieces (you will need 12 for each side, but we did two extra just in case some get lost under the couch). We made two sets, one with stars and the other with circles. We made the small circular cutter  by cutting a strip of plastic from an old yogurt container and taping into a small loop.

5. Take shapes out and set on baking sheet with the back facing up. Poke a few holes using a toothpick to prevent the pieces from bubbling up.  Bake in the over at 300 degrees until hard, flipping every 20 minutes. It should take about an hour, but it could take longer depending on how thick your pieces are.

6. While baking, make the checkerboard. I used white fabric as the base, cutting two pieces to 17x17 inches. I also made a square of batting at 16x16 inches. On one side of one piece of white fabric, I used a ruler and a fabric pencil to draw out a board. First I drew lines 1/2 inch in on each side, and then used those lines as a starting point to draw 2x2 inch squares. That should give you eight rows of squares across and eight rows of squares up and down; sixty-four squares total. Then I cut out thirty-two 2x2 inch squares of colored fabric. I used my sewing machine to sew the colored fabric in a checkerboard pattern, making sure to line the pieces up with the lines I had drawn. Once I sewed all the squares in place, I put the two white fabrics with right sides facing in (so the fabric squares are facing in toward the other piece of white fabric) and then put the batting on top. I stitched all around the three pieces of fabric (two white pieces of fabric and one piece of batting) using a 1/2 inch seam allowance, leaving a 2 inch gap at the end. I turned the piece inside out so the batting was tucked on the inside and the checkerboard pattern was facing out. I pressed the seams flat, then sewed around the entire board again. 

7. Back to the checker pieces! Once they are out of the oven and cool, paint them using acrylic or poster paints. Paint 12 (or thirteen in our case) in one color and the other 12 in a contrasting color. Kaela painted her round pieces and I painted the star pieces. 

8. Let dry completely.

9. Get ready to play!

I found a useful set of simple checker rules at this website, although I'm sure if you dig around you will find other great resources. Enjoy!


Karina
Windows of Agate

March 9, 2012

Facebook Covers of The {NewNew}


So there is no avoiding it, Facebook's Timeline is upon us whether you like it or not. Change, however, can be a great opportunity for you to play around with some really cool designs that truly express your current mood, or in the case of a fan page, your brand. For links to some helpful sites that can assist you in designing your cover scroll down to the bottom of this post. But first, here are some examples of how {NewNew} members have updated their Facebook pages to show off their products and create brand awareness.


For her fan page, Stephanie chose a brilliant image that shows off her incredible craftsmanship and also invites you with her beautiful portrait.


Kimm creates apparel with bold, abstract designs. Her Facebook cover truly expresses the design sensibility that is reflected in her work and also ties in seamlessly with the branding of her etsy shop as you can see from her Etsy shop banner below:


When I put together my cover, I wanted to show off my "stuff," but it was also important to me that the little avatar space tied into the Facebook cover overall. The easiest way for me to do that was to create a collage of images that was framed in a way similar to the avatar insert.


And finally here is Lauren's cover. Like Metalicious, she also opted for a strong product shot and added an avatar that features another one of her bag designs.


For a selection of really creative Facebook cover designs and a template to help you build yours check out Alvaris Falcon's post on HongKiat.com entitled Facebook Timeline Covers: 40 (Really) Creative Examples. If you are looking for a quick gorgeous plopper visit Bella LuElla's blog for a selection of beautiful customizable Timeline Covers and don't forget to thank her for sharing her work.

Would love to see how you customize your cover.

Simone
groundsel.etsy.com

March 8, 2012

Spring Colors Have Sprung!


 March 20th is the first official day of Spring. After yesterday, I really feel like the season is here already! It was 60!! Yeah!

Here are a few items that continue to get me in the mood with their bright colors...